Andy's Garden Railway Blog
A visitor to my line
My brother came to visit. He brought a loco, and thus it became the first visiting loco on my line

This is a Regner Konrad, kit-built loco. It's a geared, oscillating-cylinder loco. The revering lever is on top of the cylinder, and the cylinder drives a flywheel, and the gearing, which makes it quite a smooth (and realistically slow) runner. The regulator is in the cab. This is about as simple as it gets.
Well I never!
I was at a family wedding yesterday, and discoverd that a relative is a garden railway fan. His railway is the same gauge as mine, too. Stephen, you are welcome to steam up if you're over here.
Steam, at last
I Finally got a steam train running in my garden. My wife took these photos

A short while later, my wonderful wife used this photo (below) for my birthday card.

Progress on my railway — 17th May 2015
More good weather has meant more progress on the railway, which is excellent news.
Actually, to tell the truth, there's another garden project which should be commanding my attention, but it was such a sunny day that I had to retreat to a more shady part of the garden — what an excuse to get on with building the railway line eh?
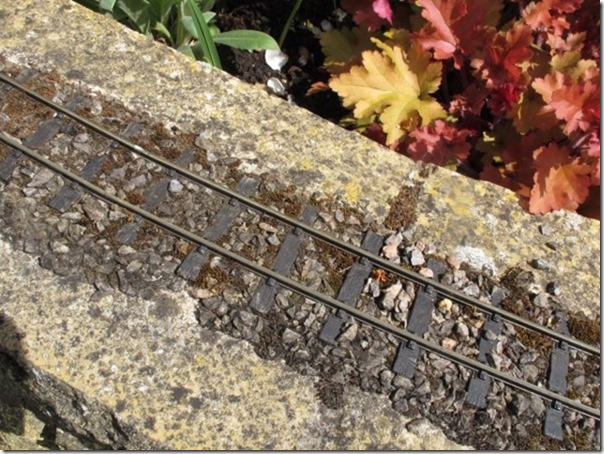
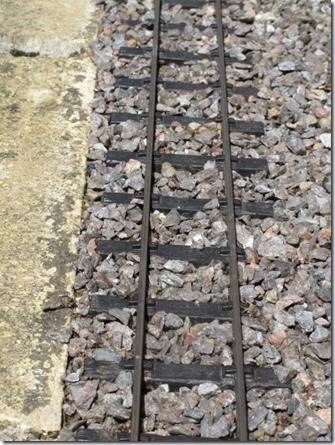
I have laid a bit more track, and put down some ballast. The ballast is actually horticultural grit, which is just about the right size. Here's a photo of a newly ballasted section.

My garden railway with newly laid ballast (horticultural grit)
The photo above is taken in the spot on the left hand side of the photo in my previous update. You will see that the grit extends beyond the edges of the timber base and among the plants, It's also interesting to see how much the little thyme plant (in the foreground above) has grown in 2 weeks.
I have not (yet) followed my friend's advice to glue the ballast down. I wanted to see how badly it would move in the rain. Early in the week, it hailed (yes! in May!) and the ballast has stayed roughly in the same place, which I am very pleased about.
10 years of ballasting experience
Today, we have a Special Guest appearance by “SteamOil”, owner of the Tryfon Vale Light Railway. He shares his experiences of how different ways of ballasting have fared over the life of his garden railway.
I have use three different ballasting techniques over the years.
I tried a small section of Rowland's Mix method, and this has stood the test of time (about 10 years so far)
The only problem was that over the years the peat content encouraged the growth if moss which I had to kill off as it rose over the rail head leading to derailments.
The bulk of my line uses horticultural grit held in place with a 50/50% mixture of
Exterior PVA and water with a dash of washing up liquid added.
This lasts several years before there is a need to be patched and re-glued.
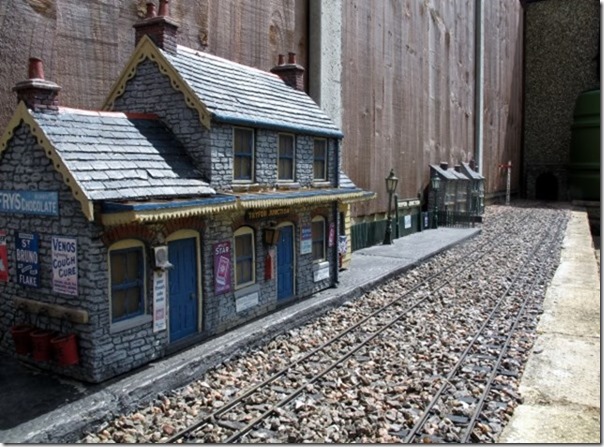
I have recently had to relay the station area due to fencing works but again I used the PVA method.
Experience seems to indicate that if the ballast is mainly in the shade it seems to break up rather sooner.
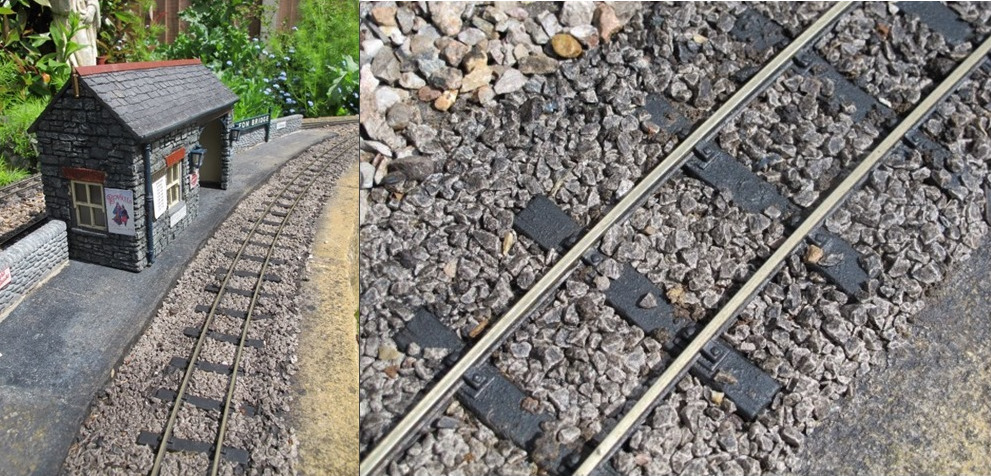
The shadowed side of the garden has been completely re-ballasted this spring using the Swift Sixteen greyish/white ballast again fixed with PVA/ water.
As the raw material was nearer white than grey, the mix was toned down with a small quantity of Black Exterior water based paint added to the PVA mix.
Time will tell how it weathers over the years.
The effect at present is the nearest I have ever come to a scale appearance.
Looking back at the Vale of Evermore video, [see below] he looks to have secured his ballast in place by adding timber up-stands to his bases to prevent the ballast from being displaced.
There are no up stands visible in the herbaceous sections.
The only problem I can see is that the soil might get washed into the ballast with heavy rain or the the other way round!
Progress on my railway — 4th May 2015
At long last, I've got to the stage where I can lay some track.
This spring, I've tidied up the corner of the garden, built up the rockery on the corner, and fixed boards to the bricks and blocks that I mentioned in my previous update. We've been blessed with good weather this Bank Holiday Weekend, which has given me time to finish planting up the rockery, and eventually, on Monday afternoon, I fixed a few lengths of track down.

Progress on the railway — Mayday Bank Holiday 2015
Along the fence visible in the photo, I've planted a dwarf conifer, and then where there isn't much space, a line of little Box plants, which should provide a nice green hedge.
Inside the rock circle will eventually be grass. The block on the right-hand-side of the photo has a hole in which marks the centre of radius. A few more lengths of track to go, and I can remove this trip hazard!
Inspiration from the Vale of Evermore
My intention is to create a pretty garden with a railway in it, one where you see the garden first, and then see a train moving through it. One of the main sources of inspiration has been the "Vale of Evermore" railway, as shown in the two videos below.
Lego Steam Trains
A Garden railway doesn't necessarily have to be serious! Here are some amazingly detailed model trains made of Lego, running around a garden.
Progress on my railway — April 9th 2014
Work has started!
The weather has been nice recently, and I've been able to get out and make some progress at long last. In this photo you can see the beginning of the curve in the corner of the garden.

The beginnings of the blockwork
Breeze blocks are laid on a bed of concrete in a trench, then tamped down with the handle of a big hammer to the correct height, ensuring each block is level in all directions, and also level with the marking pegs and earlier blocks.
The intention is to bring the railway away from the fence a bit, so I can grow some taller plants behind. You can see this in the right-hand side of the photo where I have laid things out with bricks and started digging the next bit of trench. Providing a bigger planting space should help to disguise the fence.
, ensuring the trench is correct.")
Works inspection team (AKA the neighbour's cat), ensuring the trench is correct.
I decided on a minimum radius of 4 ft 6 in. The large block has a hole, marking the centre of the circle.
The blocks will eventually have soil banked up on both sides, which will be planted, so the railway will appear to be at "ground level".