
I was getting poor quality prints on my 3D printer. There are a number of possible factors:
- The surface texture of my prints is not as good as I would like. That’s the subject of this post.
- Sometimes the first layer doesn’t stick very well to the base, and occasionally gets knocked by the print head. This is usually overcome by means of a “raft” or a “brim”.
- Objects stick really solidly to the base when they are done, and I have to use a knife to get them off.
- The filament is old, and has probably acquired moisture, so it is brittle. If I haven’t used the printer for a week, the filament between the spool and the print head snaps. I just feed the end of the filament into the top of the print head by hand, and the prints seem to come out OK.
There is plenty of useful advice for calibrating a 3D printer including this video, this blog at TeachingTech. and this page at All3DP. You can get calibration cubes, temperature towers, a test boat, and other prints from Thingiverse. These blogs look at dozens of issues that might be causing poor prints.
My printer is a Dremel 3D20, and I use Cura for my slicer. From Cura, I save the sliced gcode file to an SD card. I then plug the SD card into the printer and print from there. In reading the blogs mentioned above, I realised that I had been using the “Draft” settings in Cura rather than the “Fine” or “Normal” settings. Using the latter, and printing off some calibration cubes, I found that the results are actually quite good.
Lesson 1: Problem exists in chair, not in computer.
(I was using the wrong settings in Cura – the clue is in the word “draft”).
Cura has a number of different print profiles – from “Extra coarse” through “draft” and “normal” to “extra fine”. The difference is mostly in the layer height – the vertical thickness of each layer laid down by the 3D printer. I printed off the same “thing” multiple times with different profiles to compare the results.
Before we get to the results, here is some context. The “thing” I printed is a tower support for the amazing Gravitrax marble run from Ravensburger.
We never have enough tower supports, so this seemed like a great opportunity to try out the printer, and create some more opportunities for amazing marble runs whilst also trying out different slicer settings. Of course, someone has already designed the bits.
The default profiles in Cura are mostly the same settings : 20% infill, 200 degrees temperature, 0.8mm wall thickness, 60mm/s print speed. I chose to use supports but not raft or brim. The main difference in each test is the Layer Height – i.e. how thin each layer deposited is. Thicker layer heights equate to poorer quality but faster prints. Hence the use of the word “draft”.
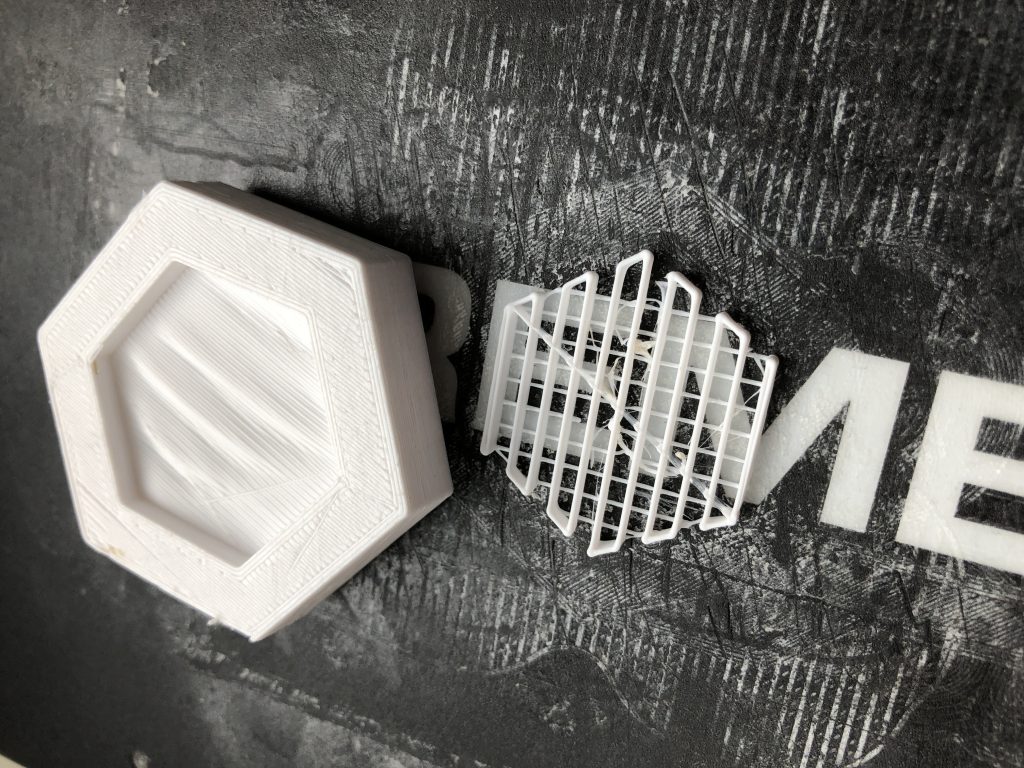
The print is actually done upside down on the printer, with the “bottom” lugs facing upwards. Supports are used so that the cutout in the “top” of the print has a smooth surface.
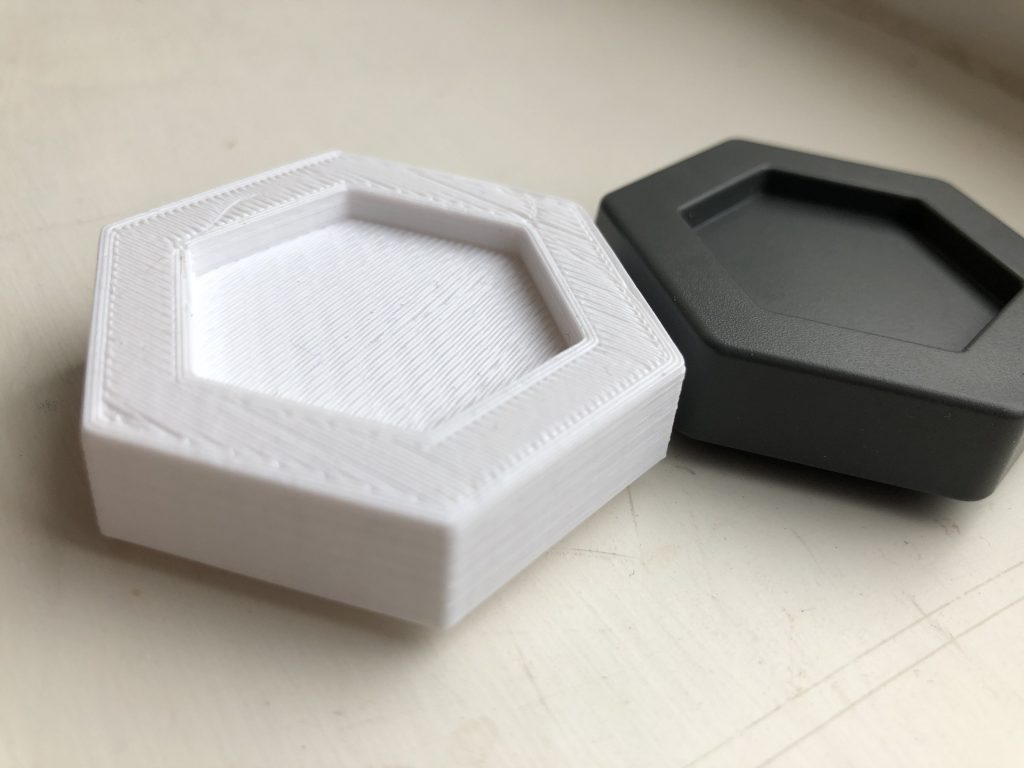
COARSE: Layer height 0.4mm. Cura estimated a print time of 21 minutes, using 283cm of filament. Actual print time was 25 minutes. This is the result (in white) next to a real (ABS injection moulded) tower support (in grey)
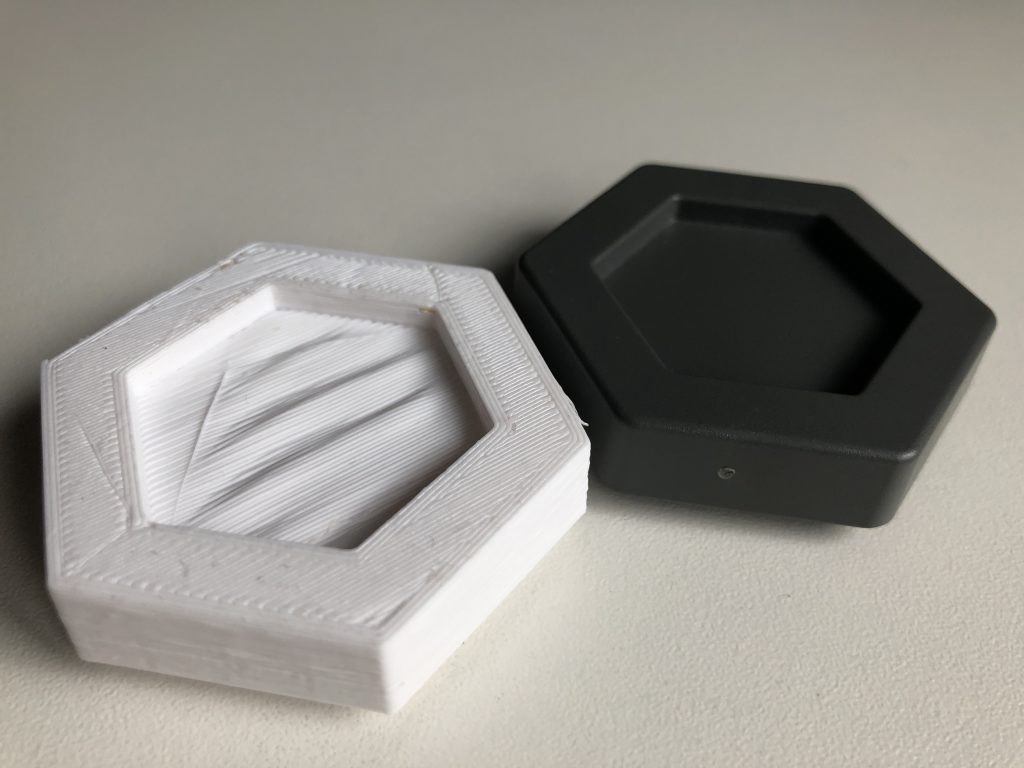
On this “coarse” print, the supports remained on the bed when I removed the model. There are some imperfections, but these are to be expected on the coarse settings.
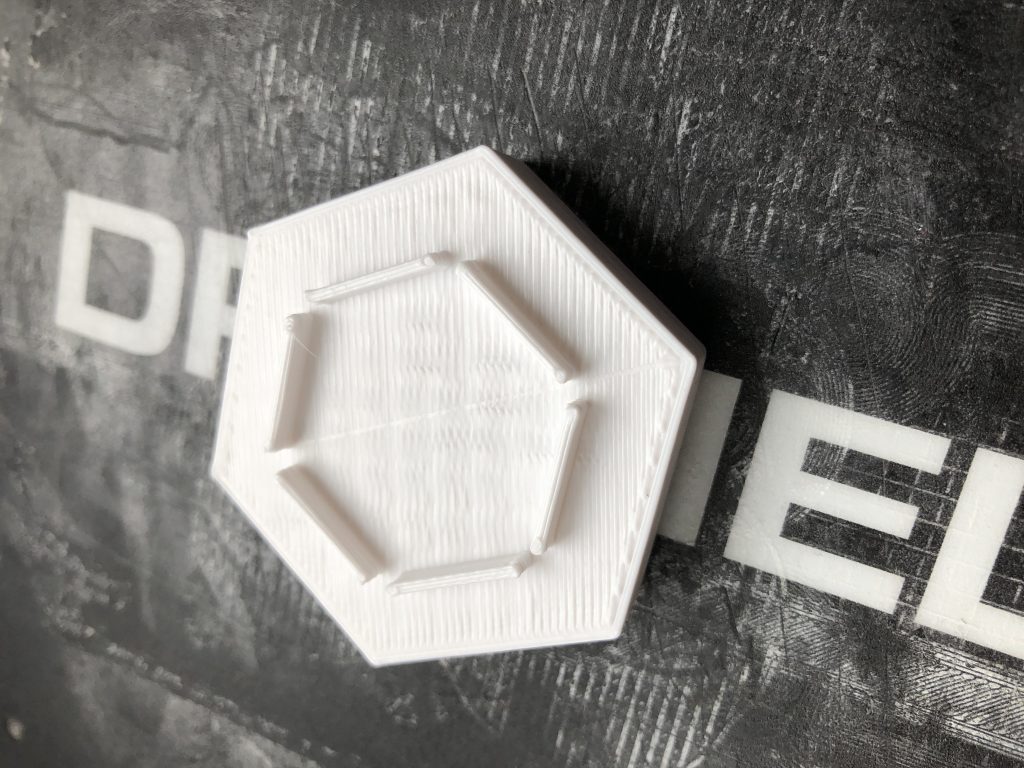
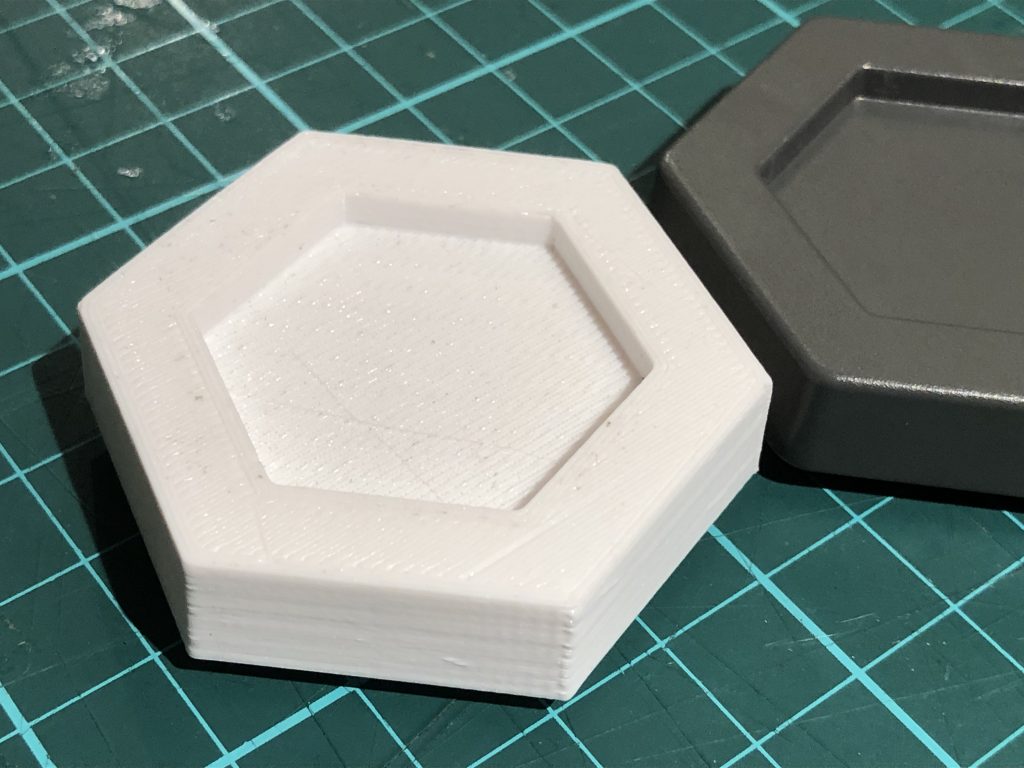
DRAFT: Layer height 0.2mm. Cura estimated a print time of 41 minutes, using 292cm of filament. Actual print time was 47 minutes. This is the result (in white) next to a real (ABS injection moulded) tower support (in grey).
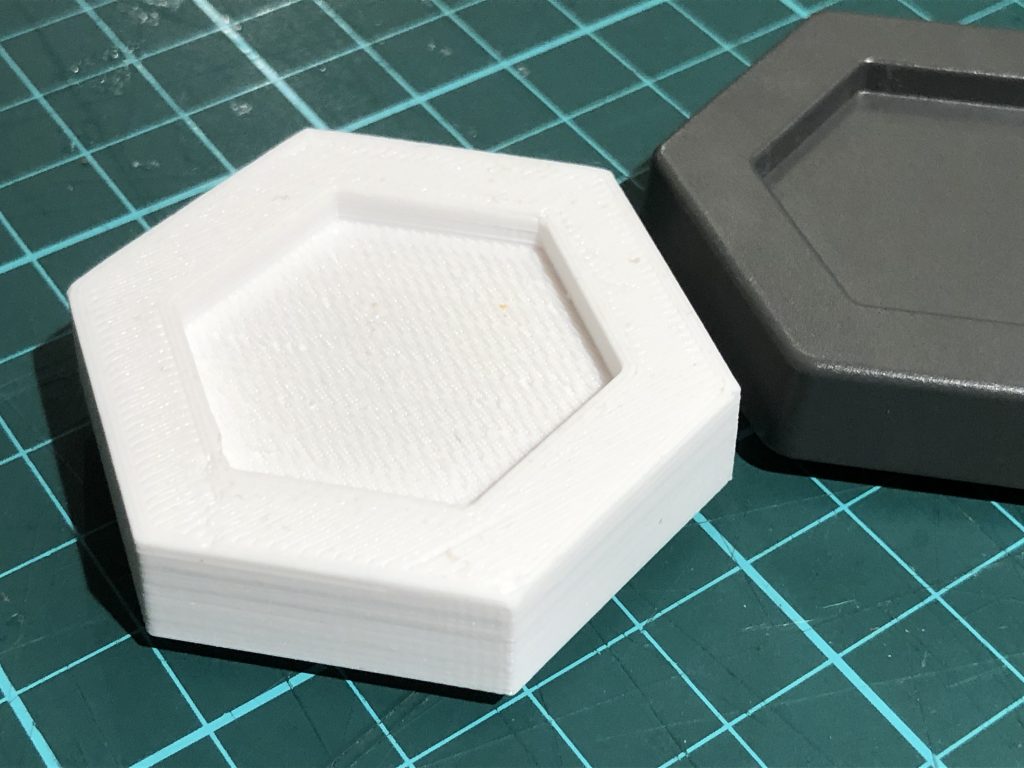
NORMAL: Layer height 0.15mm and an infill density of 10% instead of 20%. Cura estimated a print time of 47 minutes, using 294cm of filament. Actual print time was 50 minutes. This is the result (in white).
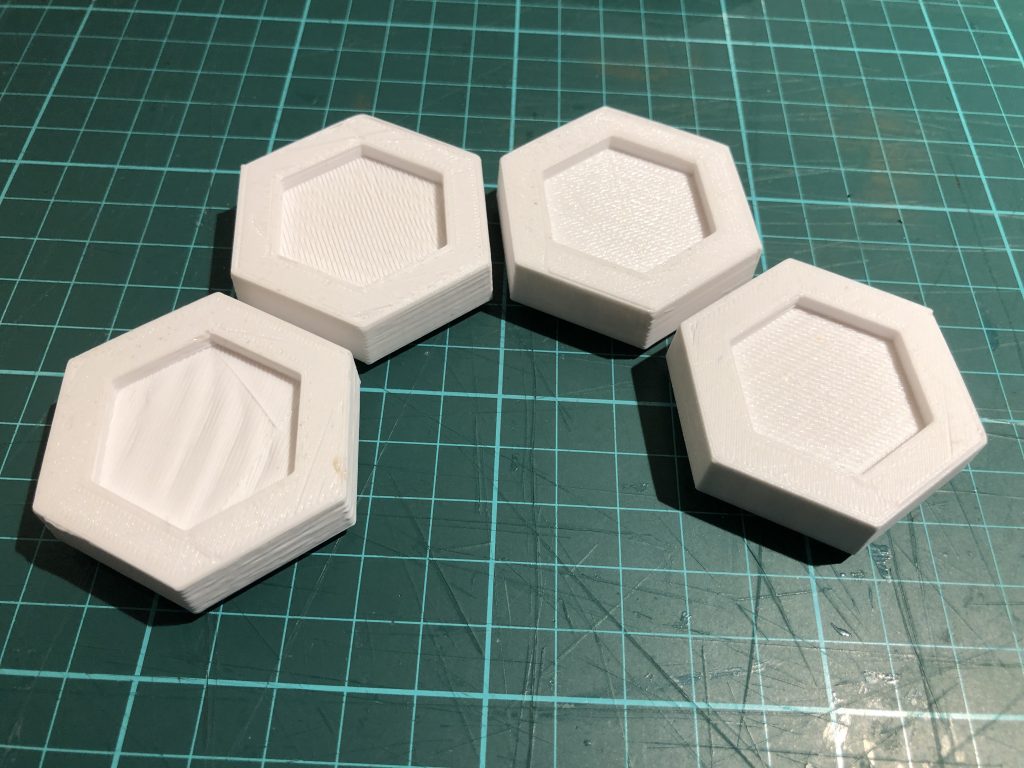
FINE: Layer height 0.1mm. Cura estimated a print time of 81 minutes, using 294cm of filament. Actual print time was 93 minutes. This is the result (in white).
Comparison: Most of my problems can be resolved by using the “normal” profile in Cura instead of Draft. On these prints. I can’t see a lot of difference in quality between Normal and Fine.
Conclusions:
- Look up the word “Draft” in the dictionary.
- Understand how the slicing software works
- Running a test like this (same “thing” different settings using the default profiles of the slicer) is a great way to understand what’s going on.