
From this … 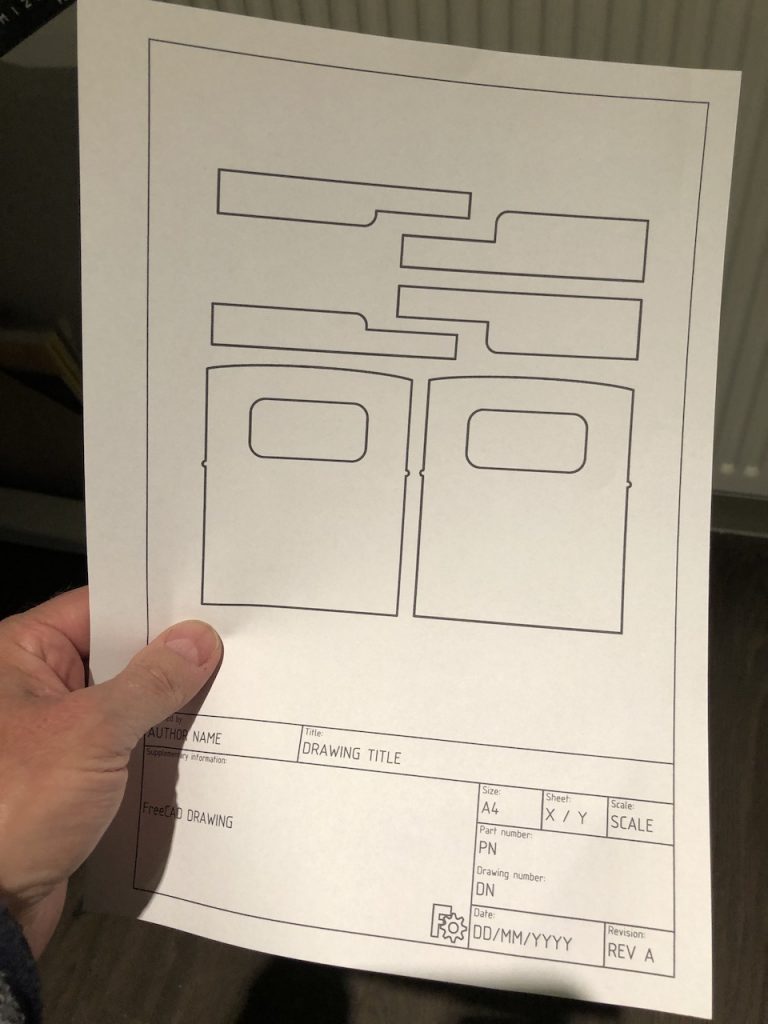
… to this.
One of the great things about having a 3D printer is the vast online library of things that one can print. Sites such as thingiverse contain everything you never knew you needed – from an airbrush stand to Lego bricks that don’t exist, via drill-bit sharpening jigs for a Dremel, and an articulated slug.
I found a 3D printed locomotive. I encountered two problems: some of the STL files contain multiple parts, and are too big for my printer; and I can’t find a way of splitting the parts so they can be printed separately (I tried Meshlab and OpenSCAD, and my brother tried Fusion360). Additionally, this model involves printing some parts that are just flat plates of plastic. There are more efficient ways of making these, such as using styrene sheet. However, it occurred to me that, if most of the parts are flat, maybe I could make them out of plywood.
So maybe the title of this article should be : 3D printing in Plywood
To do this, I need a 2D drawing of the parts (to glue onto a sheet of plywood so I can cut it out). But STL files are 3D models. However, it is possible to convert them. The process involves loading the 3D model in a CAD program and projecting the 3D model onto a 2D surface, then exporting as a drawing. I’m sure it can be done in one piece of software, but I used a 2-step process. I found the answers here (project and convert from STL to DXF) and here. (open DXF onto a drawing).
Step 1: Convert STL to DXF.
I like using OpenSCAD. It’s free, and it allows one to build up a 3D model using “Constructive Solid Geometry” – adding and subtracting cylinders, cubes and other shapes. It also supports fonts, and loads of other amazing features, but it’s not a pointy-clicky-draggy-droppy software. You have to type stuff.
- Launch OpenSCAD and put this text in the editor on the left (using your own location to your STL file):
projection(cut=false)
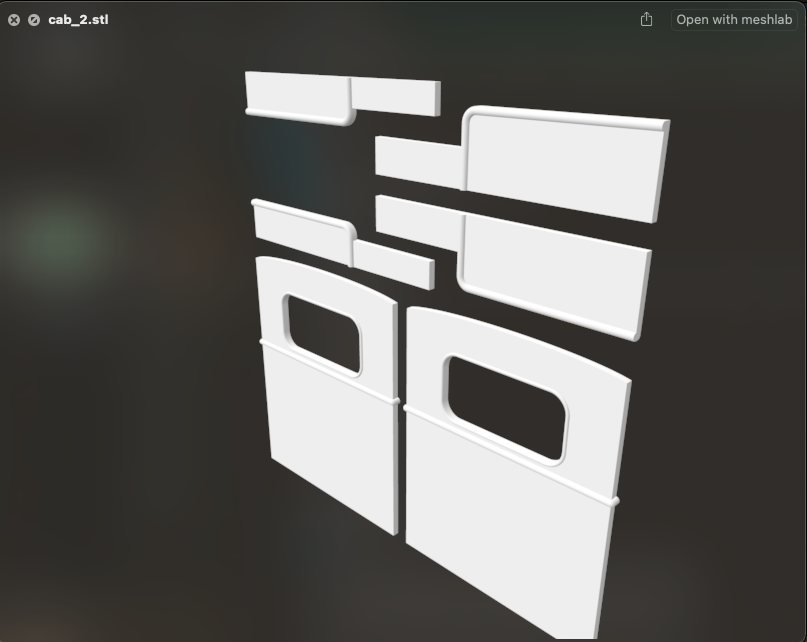
import("/Users/Path/files/cab_2.stl", convexity=3);
- Render the model (F6, or on the menu choose Design >> Render)
- Use Export >> Export as DXF
- It looks like this in OpenSCAD.

Next is to open the DXF file in a CAD program and print it. There are loads of CAD software packages out there, ranging from free to expensive commercial. AutoCAD seems to be the most popular, and I’ve heard people have great success with TurboCAD and Dassault. I haven’t purchased a license for any of these commercial tools, and don’t need to. The free open source “FreeCAD” does the job. The documentation is pretty good. In essence I did the following:
- Load the DXF file.
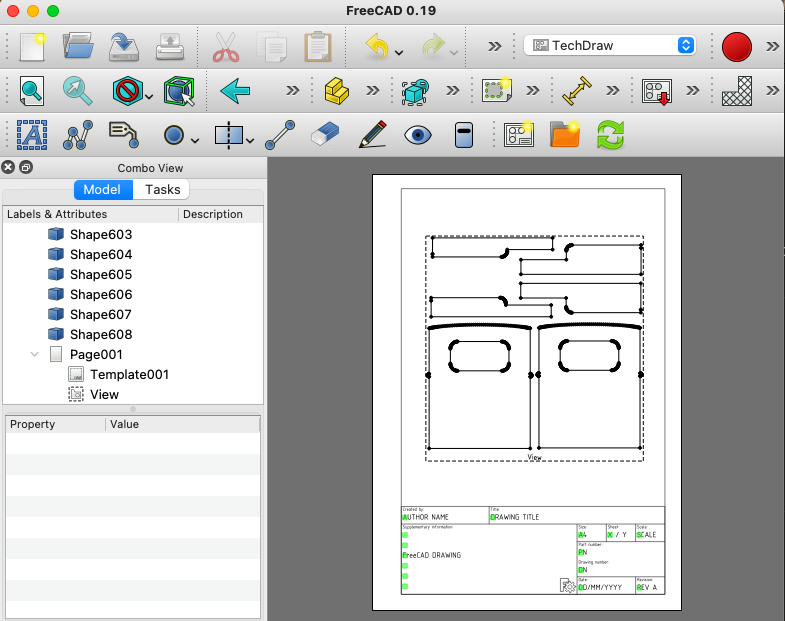
- Switch to the TechDraw workbench (another toolbar appears)
- Press the “New Pick” button (after moving the menus around to find the orange bit)
- I chose the A4_Portrait_ISO7200TD template. (TD = Technical Drawing)
- In the tree view, I selected all 608 shapes. Shift-click is your friend
- I changed the properties as per the instructions, then adjusted the X and Y values to put the parts in the right place on the drawing.
the result looks like this in FreeCAD:
It remains to do File >> Print or File >> Export PDF which results in a lovely piece of A4 paper which I can glue on the plywood to cut it out with a fret-saw.
Update: the end result is visible here.